In this blog I collect all knitting-related information.
I publish my ideas and patterns, report progress
and link things I find.

Thursday, February 24, 2011

Stitch Markers

I used to not like or use stitch markers. But then you do patterns that become incredibly much easier with stitch markers. Some are only possible, really, with markers, and some instructions you do not understand, when you do not use markers.

Ich mochte Maschenmarkierer nie. Aber dann beginnt man, mit Mustern zu arbeiten, die mit Maschenmarkierern leichter zu handhaben sind. Die eine oder andere Anleitung kann man nicht einmal wirklich verstehen, wenn man den Angaben für das Setzen der Markierer nicht folgt.

Stitch markers - Maschenmarkierer

So I eventually got into making more than just string loops. But don't back out: simple string loops do the job as well, almost as well.

Ich habe also irgendwann angefangen, Maschenmarkierer zu benutzen, und bald auch mehr als einfache Fadenschlingen. Aber auch die sind nicht schlecht: Eine simple Schlaufe mit einem Knoten kann genauso praktisch sein, beinahe jedenfalls.

Ich stricke hübsche Sachen, also will ich auch hübsche Werkzeuge dabei verwenden. Also habe ich mir in diesem Jahr ein paar sinnvolle Maschenmarkierer gemacht, die auch noch gut aussehen.

I am knitting pretty things, so I want pretty things to be involved into my knitting process. This year I made some really nice and useful stitch markers. 

First I want to show a set I got in the mail, yesterday. It is a gift from Clarice at "giftgrün" - so I do not take credit for the creation. But they are pretty and neat and useful and brand new to my home, so I want to show them:

Zuerst möchte ich aber ein Set zeigen, das ich gestern abend aus der Post geholt habe. Ich habe in der Valentinsverlosung von Clarice in ihrem Blog - giftgrün - gewonnen habe. Dieses wunderhübsche Set war gemeinsam mit meinem Gewinnerherz gestern abend da, als ich nach Hause kam.


a set of 4+1 stitch markers by clarice39

With the green stitch markers you see a set of multiple markers. One of them is different. That one is usually meant to show a very prominent part in the pattern, for example the beginning of the round. The double pearls make a great divider that you recognize when you get to it.

Clarice sells her stitch markers and other crafty things on DaWanda. Check it out!

Die grünen Maschenmarkierer sind ein Set von mehreren, die zusammengehören. Einer von ihnen ist anders. Durch die Unterscheidbarkeit markiert er in der Regel eine besonders prominente Stelle im Stück, beispielsweise den Beginn einer Runde. Die doppelte Perle übersieht man nicht, wenn man an sie gelangt.


The markers I made this week are for projects with even more detailed information needed, or maybe just for the fun of it.

Die Maschenmarkierer, die ich diese Woche gemacht habe, sind für Projekte gedacht, die viel mehr Details verlangen oder in denen diese Dinger einfach gut aussehen.


set of labled markers by me

Ich habe die Buchstaben  A, B, C und D verwendet, als kleine Perlen. (Ja, ich habe das D falsch rum angebracht, ich habe es schon geändert.)

I used pearls with letters A, B, C, D (yes, I know I did mount the D wrong. I did fix that by now.)

This way you can mark the spots exactly. For patterns with a lot of need of marking I made the extras with "&" and the smilie. They are great to mark linkes of increase or decrease and so on. And they smile at you. And that is a good thing.  

Auf diese Weise kannst Du den Punkt genau bezeichnen. Für Muster, die eine Menge Markierung benötigen, habe ich zusätzlich die "&" und die Smilies gemacht. Die sind großartig, um Zunahme- oder Abnahmelinien zu markieren, oder Ähnliches.

Also, was braucht man für die Markierer?

So what do you need for markers?

Most things that you need you find in the jewlery department of craft stores.
You can make a lot of different style markers, beginning with little loops made from yarn in a contrast color (or more than 1 color). Rings with a second eyelet make great markers, since the loop goes onto the needle and you attach the beads or whatever you use to the second opening.
Rings with a hole in the side provide a similar option.
But with every ring you have to have a propper size for the needles you use, a ring alone does the trick but does not balance as easily, a ring with attachments has all those fixings again...

Rings, though, can stretch the strand between the stitches. And split rings can get stuck in the yarn, so they are partially not very useful.

Die meisten Sachen findet man in der Schmuckabteilung der Bastelläden. man kann jede Menge verschiedener Markierer machen, angefangen mit Schlaufen in kontrastfarbenem Garn oder mehreren Garnfarben. Ringe mit zweiter Schlaufe sind optimal, in der zweiten Schlaufe / Öse kann man die Perlen oder Anhänger befestigen, während der erste auf der Nadel sitzt. Ringe mit einem Loch in der Ringwand sind fast genauso einzusetzen. 
Leider bietet jeder Ring aber nur eine begrenzte Größe für Nadeln, denn der Umfang ist genau und undehnbar für eine maximale Nadelgröße einsetzbar.
Auch ein RIng allein ist nützlich, aber er ist nicht so ausballanciert wie ein Ring mit Anhänger.

Außerdem ist bei einem Ring immer die Gefahr, dass der Maschenzwischenraum gedehnt wird. Es ist immer eine Gratwanderung bei der Auswahl des Ringes. Ringe mit einem offenen Anschluss verhaken sich gelegentlich im Garn und sind daher nur begrenzt einsetzbar.


You can use string or rubber cord for jewlery. That works and is gentle even on the most sensitive needles. But large pearls are rare and partially unpractical.

What I used for my set - and what Clarice used for hers - is jewlery wire. It forms a nice open loop, is thin enough to go through the smaller beads and openings and is durable.

For attatching and securing I used the little squeese pearls from the jewlery shop.

Man kann Faden, Schnur oder Kunststoffbänder verwenden. Diese Materialien funktionieren, sind sanft zu den Nadeln und können gut verwendet werden. Bei dickerem Material ist aber die Auswahl von Perlen mit so großer Durchführung ist begrenzt.

Zur Befestitgung benutze ich in der Regel Quetschperlen aus dem Schmuckbedarf. 

Für die Marker oben habe ich Schmuckdraht verwendet - ebenso wie Clarice bei ihren Markern. Der ist leicht zu verarbeiten, dünn und bietet flexible, größere Schlaufen, ohne die Maschen zu dehnen.

The tools you need are a set of small plyers, a wire cutting tool (the plyers or sturdy scissors) and patience.

Have fun designing your own markers.

These here I love for the beginning-of-the-round-markers:

Die Werkzeuge, die man braucht, sind leicht zu finden: Eine Zange mit feinen Greifflächen, ein Werkzeug, um  den Draht zu schneiden - also eine Zange oder eine kräftige Schere, deren Schneide nicht leidet.

Viel Spaß beim Designen von eigenen Markern.


Diese hier mag ich übrigens als Rundenmarkierer. Wieder eine Runde abgeschlossen.


Monday, February 7, 2011

Old knitting tools

A while ago I came across the knitting belt. I want to share that information with you here.

On the Shetland Islands women used to knit while doing other work and chores. Yes, that sounds like a dream. But how do you knit and work at the same time? You need two hands for knitting and how do you want to do your other work?

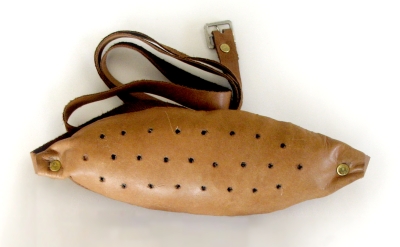
Well, they sometimes used a knitting belt. Here is a picture of this belt.

That belt held one needle in a leather cussion that had holes to poke the needle into and that way only one needles needed to be moved and held.

I do not want to claim that I know a lot about the knitting belt, but I am curious about it and hope for comments of any of you who can add some information.

One other tool was a knitting sheath, shown on the sight Old & Interesting, linked below.

I also found this fellow blogger, who shows the work with a selfmade sheath in a video. His blog you find here: A Fisherman Knits and the video is here.

Google helped me to find some more information on the topic. Look here: Old & Interesting and here Pine Cone Lodge and many more places.

The information is of historic value, right. And it is - for some people - the way that knitting is done. But what good is that for everyone else to know?

Well, I guess, knowing more about the different types of knitting and the methods people have come up with, help us to understand more about knitting.

I know several knitters, acutally, who claim that they move one needle only and the other is just held in position (with long needles: clamped under the arm) and that works perfectly fine. It is not much different than working with a sheath, really.

These methods can also be really practical when you suffer from some kind of problem and are looking for a way to knit anyways, because if you are a knitter than you really want to knit.

I know with a lot of people that especially when they knit a lot or knit bigger pieces they have pain in their shoulders or neck and often have pain in the wrists.

I am pretty sure, a lot of that painful condition can be cured by using a knitting belt or sheath or something simmilar.

Me, personally, I work with circular needles instead of long straight needles. They make the knitting rest in my lap easier and there is not as much leverage. But that is not the cure for everybody.

There was also this report of that boy who inveted a knitting frame or cradle of some sort for his grandmother but google just fails me and I can not find it again.


I do want to stress that I do not know the two sights I linked above. I do not know the owners of the pages and I do not have background knowledge to back or question the information there. I just want to collect information here and if you know anything else or find other sights with information: let everybody know!

I also want to stress that I only collected links to the pages. I do not claim that any of their content was mine.

But I do want to draw your attetion to that blog I linked above: A Fisherman Knits That man has collected and worded so much technical knowledge that I got lost browsing his blog. One final link here:  Wood for knitting sheath because that fits the topic. And then I strongly recommend to search out more information on his blog!

Saturday, January 29, 2011

Charity knitting for preemies - Frühchenaktion bei Drops, Ravelry

I have joined a charity knit-along on Ravelry. The German Drops group on Ravelry has called for the event since the beginning of the year.
We are producing big amounts of preemie outfits. Socks, hats, blankets and sleeping bags, all made out of sock yarn - because it is washable hot enough and does stand the desinfection process.

The pieces will be given to several hospitals in Germany.

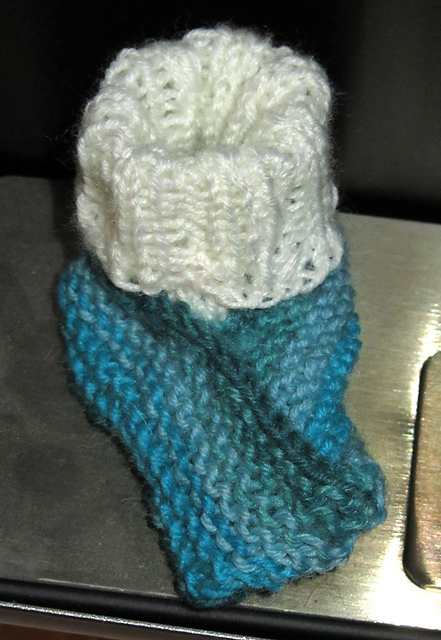
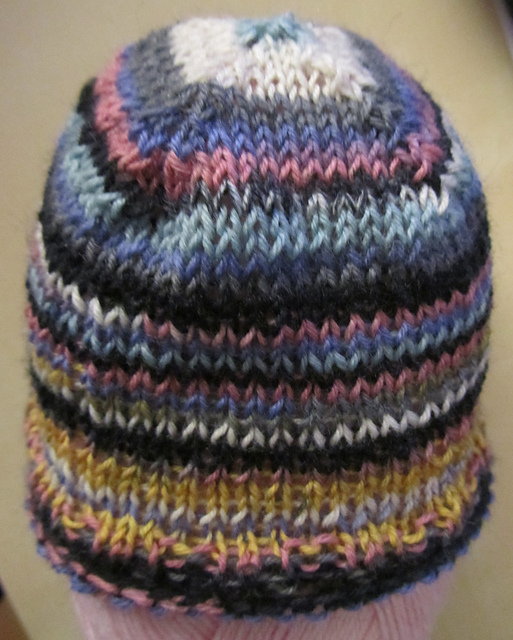
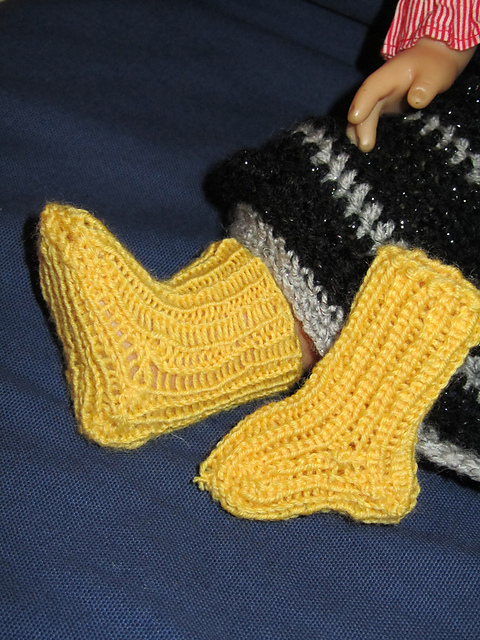
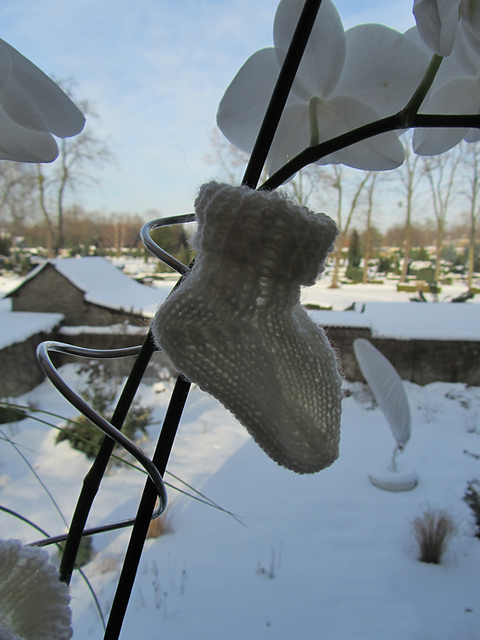
I happily joined the KAL and have had a lot of fun, making a bunch of very cute outfits. Mostly I make sets of hats and socks in different sizes. The small pieces give me a great chance to try new things or work with yarns that I would usually not use. Especially the very colorful sock yarns would usually not end up in my shopping basket. But they are fun for a change.

The project in itself is very satisfying and makes me feel gut.


Ich habe mich bei Ravelry dem Frühchen-Charity-Knit-Along angeschlossen, den die deutschsprachige Dropsgruppe seit Jahresanfang veranstaltet.
Wir stricken gemeinsam eine Menge Frühchen-Outfits, die wir dann an verschiedene Krankenhäuser spenden. Socken, Mützen, Decken, Strampelsäcke (Pucksäcke). Wir stricken aus Sockengarn, weil das heißer gewaschen werden kann und der Desinfektion standhält. Ich komme mal dazu, mit sehr bunten Garnen zu arbeiten, die normalerweise nicht in meinem Einkaufskorb landen.

Die kleinen Stücke geben mir die Gelegenheit, Dinge auszuprobieren und zu experimentieren.


Sunday, December 5, 2010

Felting - My first project

Felting I had seen but never made. Now I used a Kint-A-Long on Ravelry as an excuse to start or as a reason to not have excuses.

I used the Filz-It yarn by G-B, in white. And added some accents in light and middle green, using Drops yarn Eskimo. My needles were No. 10
The instruction I worked by is by Garnstudio / Drops as well: 104-4_felted_slippers

My progress I can present as follows. Today is a Sunday and I really wanted to get these shoes done. So I started a little before 1 pm and they went into the washing machine at 4 pm, so really, it was a very fast projects.

starting out
starting out
knitting this weird cloth
very lose stitches
mid-knitting
sewn up the first shoe
This puffin just had to crawl in
wow, 2 feet fit into one shoe before felting
they go in! Just 3 hours after the first stitch is cast on
fresh out of the wash, round 2


And here is the final outcome:
ready to wear

I knit them up to size, sewed them up and instead of a border in a different color I croched a border around the opening in the same color (single crochets) and then I stitched around the top edge with the 2 colors of Eskimo (keeping the light and the dark to opposing sides on both so that either both outsides or both insides are light).

I put them into the machine alone with powder detergent on a quick-cicle at 40 degree C. I did not think of putting a tennis ball into the machine with it until later. Maybe that would have helped some.
After the cicle the shoes had started to felt some but they were far from done. So I put them into a ful cicle with detergent again, upping the temperature to 50 degree C. This time they came out great.

When I took them out - still wet of course - they were slightly smaller than my feet and I could pull them into shape.
There only is one issue on them, that I will have to fix: in one of them, a part of the tip got turned towards the inside and the rest felted over the tip. That looks great and even identical to the other shoe from the outside. But on the inside there is a lump I will have to work away (maybe by cutting).

The best idea I had for shaping was to put the shoes on my feet and pull them a little to make them fit right snug. So it may be more problematic to make a fitting shoe for someone with a different shoe size if the person does not help with that.

But of course you can always re-wet the shoes later to shape them.

My result to machine felting: It is easier than I thought. You actually have more influence on the outcome than I thought by stepping up temperature and cicle length.

By putting a tennisball or something alike into the machine with the shoes, you create more motion which helps the felting. I did not do this on either cicle but I may do this next time.

I will soon make more shoes, just because it is fun and quick and useful.

An idea I had was to only make a sole for a warm sock and start knitting up from there. That makes a sturdy warm sole with a comfortable sock on top.

Saturday, October 2, 2010

I don't believe in scarfs - cabled hat and scarf with pattern

Last spring I made this hat and scarf for my husband. Right now I am writing the pattern down for it.
The pattern you find here:

Pattern


on the beach in northern Germany, Fall 2010
Flying a kite on the beach, Fall 2010

I would like to say "Thank You" - almost 450 views / downloads of the actual pattern PDF in less than 2 weeks after posting. That seems like a lot to me and I am happy about this sucess!


Thursday, September 30, 2010

Stranding - Color work with woven inside

When knitting with more than one color there are different techniques how to make the inside look more or less nice. Stranding and intarsia are the most known. Fair Isle is a special method within stranding and the term sometimes seems to be used for all stranding work.

When I work with 2 or 3 colors in stranding, I weave in the yarn that I carry on the inside. One example you see here:


http://hyperactiveknitting.blogspot.com/2010/09/neckwarmer-drops-116-10.html

And another one here:

http://hyperactiveknitting.blogspot.com/2010/09/spongebob-pullover.html

The advantages are:
- a better look of the inside
- a better feel of the fabric
- a more equal thickness of the fabric (makes gloves or mittens or socks feel less like they are warm only in some spots)
- less chance to get stuck (especially important for garment, not so much for stuffed animals). Fingers (e.g. on gloves and sleeves) and toes get stuck on long loopy sections for adults and kids and especially for babies. Buttons on shirts have a tendency to get cought up in the strands, as well.

So, how do you do it?
There are multiple ways of handling this problem so I made 2 videos of how I handle it:

The knit stitch (RS):
on youtube:

Stranded Knitting - Knit


The purl stitch (WS):
on youtube:

Stranded Knitting - Purl


If you think that that was too fast... here is the ultra slow-motion version of my knitting (knit and purl side):

The main color is white, the contrast color is dark gray.  I am just knitting a sample with chess board pattern here and the video is made with actual slow-motion technique. I hope you can see how the weaving is done.


I hold the main color regularly on my index finger and the contrast color on the same finger but towards the front. When working the stitches I take the working yarn once over and once under the other yarn. To make that happen I do seperate the yarns with my fingers (without dropping my yarnholding). I mainly use my right index finger to slide in between the yarns and pulling one over or one under as needed. But I use other fingers, as well. It is much easier to see than to read. So here is the video without text, but 3.5 times slower than real life - and I did work slowly. I also took a colored background to make both colors very visible.


Stranded Knitting - Slow-Mo

If you are able to knit both Continental Style and English Style there is a really neat instruction at Philosopher's wool but since I can not do English Style so I stick with my method.

Philosopher's Wool


For those, who knit English style there is a video to achieve the same effect:

English Style

A video for the 2-handed method with German text I found here:
http://strickpraxis.wordpress.com/2008/04/27/141/?


For any questions please ask here or on youtube or send me an e-mail.

Thursday, September 23, 2010

Hemming on knitting

Stochinette stitch does curl. But we don't usually like it to do so.

I have been working on a technique that bases on "one color double knitting" to keep stochinette from curling on my projects. And on the "nicest open side knitting" I could find for projects like cardigans and scarfs. My result is "Hemmed knitting" that comes from a combination of straight knitting, tubular knitting, double knitting and such. I do not know if this has been done but I have not seen it in explanations and

Here is what I achive (in a sample of 3 stages that I will explain).


if this technique has a name, please let me know.

This is how I do it:


Side hems

cast on your stitches for the front side. Cast on as many stitches as you want for your back hems (e.g. 3 extra for each side). For a project of  10 stitches in stochinette and 3 stitches hemming on each side that will be 16 stitches to cast on.

Now you do it as follows:

(all slipping of stitches goes purl wise)

RS row:
*k 1, with yarn in front slip 1* (repeat between * 2 more times), knit to the other hem: last 7 stitches work as follows: **k1, with yarn in front slip 1 ** (repeat between ** 2 more times), k1 tbl (through the back loop)

turn your work.

WS row:
***with yarn in back slip 1, knit 1***  (repeat between *** 2 more times) purl to the other hem then work the stitches at the end as follows: ****with yarn in back slip 1, knit 1****  (repeat between **** 2 more times) slip the last stitch

turn your work, repeat RS row and WS row for as much as you want to work.

to cast off:

knit the 1st stitch, purl the second stitch, knit the 3rd stitch. then lift the 1st and 2nd stitch over the 3rd stitch together. Keep doing this with all the stitches of the double work.


To explain it in other words: the hems are worked in the round on straight needles (the knitting and slipping purlwise with yarn in front would lead to a big tube if done with all stitches). The difference is that here you work a flat piece in the middle.

By working the last stitch of the RS through the back loop the side becomes flat and turns on the edge stitch. Almost the same I get when slipping the last stitch on the WS rows and knitting it as first stitch of the RS row.

When working these edges the edge stitches get worked only half as often as the middle stitches. If the middle is plain stochinette stitch this will lead to the edges being a little shorter than the middle. If you make a narrow piece with just one hemmed side it will curve with the hem being in the inside of the curve. So I recommend doing the hem only on wider pieces or on both sides. You can also work one or more middle ridges near that edge to balance the tension.


Middle ridges:

The sample piece has a middle ridge as well.

This is worked by knitting 1 stitch, slipping the next purlwise with yarn in front. The ridge will be as wide as the number of slipped stitches. Since these stitches will not make the piece wider, you need that many extra stitches. This is the change you need to make for adjusting a scarf or pattern.


Step 1 / 2 / 3:

The sample picture No. 1 shows the red (1), blue (2) and green (3) line. The areas beneath these lines are different stages of the swatch.

In the red (1): the swatch is only hemmed on the right side (seen from the RS of the fabric). The fabric curves to the right a bit (because of the different tension and the narrow strip)

In the blue (2) section I cast on additional stitches and made the middle ridge (some stochinette stitch being to its right still). This kept the piece mostly straight.

In the green section (3) there is a left hem, a middle ridge and a right hem keeping the piece straight and smooth.


Look and use:

The backside looks almost like ribbing in this piece because the hems and the middle ridge (that are not spaced evenly here) create different appearance of right side and wrong side stochinette. The difference to regular ribbing is that the front is all stochinette and the back is doubled up with an extra layer. The fabric actually is double thick there.

In the way these features are worked the fabric is not only double layered in parts but these hems and ridges are also tubes. They could be worked with open cast on or cast off and hold a string - like the strap for a hood on a sweater or the like.

I might make a video for the technique and link it here, but I think this description explains it pretty well.

For any questions please leave a comment or write me an email. I will do my best to help on!


Further technique:

if you want the bottom of the sections to be open, there are different ways to achive that.

For example here is a blog I got refered to:
Lost Arts Blogspot

Here is more web-info:
http://www.etsy.com/shop/klymyshyndesign?section_id=5120832

Saturday, September 18, 2010

neckwarmer Drops 116-10


I made this neckwarmer I had been looking at for a while.
It took me 2 train rides across the country of 6 hours each. My total work time may have been near 10 hours or so, maybe a little over.

The yarn is Merino Extra Fine by Drops (not Karisma as it called for)

http://garnstudio.com/lang/de/visoppskrift.php?d_nr=116&d_id=10&lang=de

here is my result:

inside with strands cought every second stitch


presented by my trusty hedgehog Meckie:


Addition: I have meanwhile made 2 videos about how to knit while weaving in the yarn on the inside and I want to link them here for further reference:


By the way: This is how I look with the whole winter set I made, just in case you wondered:


Sunday, September 12, 2010

Spongebob - Progress

The Sponge has taken shape. I am done with knitting both the sides and have done most of the stitching of lines on it. Once that is finished up I will sew it up and do the cuffs on neck and sleeveholes.

Friday, September 10, 2010

my background pictures

I still battle with the blog to get my background picture to look just like I want it. Once I have that done I will change it from time to time.
Mainly my background pictures are not knitting related (exceptions may happen, who knows) but photo related since I do have other hobbies as well :)