In this blog I collect all knitting-related information.
I publish my ideas and patterns, report progress
and link things I find.

Sunday, December 5, 2010

Felting - My first project

Felting I had seen but never made. Now I used a Kint-A-Long on Ravelry as an excuse to start or as a reason to not have excuses.

I used the Filz-It yarn by G-B, in white. And added some accents in light and middle green, using Drops yarn Eskimo. My needles were No. 10
The instruction I worked by is by Garnstudio / Drops as well: 104-4_felted_slippers

My progress I can present as follows. Today is a Sunday and I really wanted to get these shoes done. So I started a little before 1 pm and they went into the washing machine at 4 pm, so really, it was a very fast projects.

starting out
starting out
knitting this weird cloth
very lose stitches
mid-knitting
sewn up the first shoe
This puffin just had to crawl in
wow, 2 feet fit into one shoe before felting
they go in! Just 3 hours after the first stitch is cast on
fresh out of the wash, round 2


And here is the final outcome:
ready to wear

I knit them up to size, sewed them up and instead of a border in a different color I croched a border around the opening in the same color (single crochets) and then I stitched around the top edge with the 2 colors of Eskimo (keeping the light and the dark to opposing sides on both so that either both outsides or both insides are light).

I put them into the machine alone with powder detergent on a quick-cicle at 40 degree C. I did not think of putting a tennis ball into the machine with it until later. Maybe that would have helped some.
After the cicle the shoes had started to felt some but they were far from done. So I put them into a ful cicle with detergent again, upping the temperature to 50 degree C. This time they came out great.

When I took them out - still wet of course - they were slightly smaller than my feet and I could pull them into shape.
There only is one issue on them, that I will have to fix: in one of them, a part of the tip got turned towards the inside and the rest felted over the tip. That looks great and even identical to the other shoe from the outside. But on the inside there is a lump I will have to work away (maybe by cutting).

The best idea I had for shaping was to put the shoes on my feet and pull them a little to make them fit right snug. So it may be more problematic to make a fitting shoe for someone with a different shoe size if the person does not help with that.

But of course you can always re-wet the shoes later to shape them.

My result to machine felting: It is easier than I thought. You actually have more influence on the outcome than I thought by stepping up temperature and cicle length.

By putting a tennisball or something alike into the machine with the shoes, you create more motion which helps the felting. I did not do this on either cicle but I may do this next time.

I will soon make more shoes, just because it is fun and quick and useful.

An idea I had was to only make a sole for a warm sock and start knitting up from there. That makes a sturdy warm sole with a comfortable sock on top.

Saturday, October 2, 2010

I don't believe in scarfs - cabled hat and scarf with pattern

Last spring I made this hat and scarf for my husband. Right now I am writing the pattern down for it.
The pattern you find here:

Pattern


on the beach in northern Germany, Fall 2010
Flying a kite on the beach, Fall 2010

I would like to say "Thank You" - almost 450 views / downloads of the actual pattern PDF in less than 2 weeks after posting. That seems like a lot to me and I am happy about this sucess!


Thursday, September 30, 2010

Stranding - Color work with woven inside

When knitting with more than one color there are different techniques how to make the inside look more or less nice. Stranding and intarsia are the most known. Fair Isle is a special method within stranding and the term sometimes seems to be used for all stranding work.

When I work with 2 or 3 colors in stranding, I weave in the yarn that I carry on the inside. One example you see here:


http://hyperactiveknitting.blogspot.com/2010/09/neckwarmer-drops-116-10.html

And another one here:

http://hyperactiveknitting.blogspot.com/2010/09/spongebob-pullover.html

The advantages are:
- a better look of the inside
- a better feel of the fabric
- a more equal thickness of the fabric (makes gloves or mittens or socks feel less like they are warm only in some spots)
- less chance to get stuck (especially important for garment, not so much for stuffed animals). Fingers (e.g. on gloves and sleeves) and toes get stuck on long loopy sections for adults and kids and especially for babies. Buttons on shirts have a tendency to get cought up in the strands, as well.

So, how do you do it?
There are multiple ways of handling this problem so I made 2 videos of how I handle it:

The knit stitch (RS):
on youtube:

Stranded Knitting - Knit


The purl stitch (WS):
on youtube:

Stranded Knitting - Purl


If you think that that was too fast... here is the ultra slow-motion version of my knitting (knit and purl side):

The main color is white, the contrast color is dark gray.  I am just knitting a sample with chess board pattern here and the video is made with actual slow-motion technique. I hope you can see how the weaving is done.


I hold the main color regularly on my index finger and the contrast color on the same finger but towards the front. When working the stitches I take the working yarn once over and once under the other yarn. To make that happen I do seperate the yarns with my fingers (without dropping my yarnholding). I mainly use my right index finger to slide in between the yarns and pulling one over or one under as needed. But I use other fingers, as well. It is much easier to see than to read. So here is the video without text, but 3.5 times slower than real life - and I did work slowly. I also took a colored background to make both colors very visible.


Stranded Knitting - Slow-Mo

If you are able to knit both Continental Style and English Style there is a really neat instruction at Philosopher's wool but since I can not do English Style so I stick with my method.

Philosopher's Wool


For those, who knit English style there is a video to achieve the same effect:

English Style

A video for the 2-handed method with German text I found here:
http://strickpraxis.wordpress.com/2008/04/27/141/?


For any questions please ask here or on youtube or send me an e-mail.

Thursday, September 23, 2010

Hemming on knitting

Stochinette stitch does curl. But we don't usually like it to do so.

I have been working on a technique that bases on "one color double knitting" to keep stochinette from curling on my projects. And on the "nicest open side knitting" I could find for projects like cardigans and scarfs. My result is "Hemmed knitting" that comes from a combination of straight knitting, tubular knitting, double knitting and such. I do not know if this has been done but I have not seen it in explanations and

Here is what I achive (in a sample of 3 stages that I will explain).


if this technique has a name, please let me know.

This is how I do it:


Side hems

cast on your stitches for the front side. Cast on as many stitches as you want for your back hems (e.g. 3 extra for each side). For a project of  10 stitches in stochinette and 3 stitches hemming on each side that will be 16 stitches to cast on.

Now you do it as follows:

(all slipping of stitches goes purl wise)

RS row:
*k 1, with yarn in front slip 1* (repeat between * 2 more times), knit to the other hem: last 7 stitches work as follows: **k1, with yarn in front slip 1 ** (repeat between ** 2 more times), k1 tbl (through the back loop)

turn your work.

WS row:
***with yarn in back slip 1, knit 1***  (repeat between *** 2 more times) purl to the other hem then work the stitches at the end as follows: ****with yarn in back slip 1, knit 1****  (repeat between **** 2 more times) slip the last stitch

turn your work, repeat RS row and WS row for as much as you want to work.

to cast off:

knit the 1st stitch, purl the second stitch, knit the 3rd stitch. then lift the 1st and 2nd stitch over the 3rd stitch together. Keep doing this with all the stitches of the double work.


To explain it in other words: the hems are worked in the round on straight needles (the knitting and slipping purlwise with yarn in front would lead to a big tube if done with all stitches). The difference is that here you work a flat piece in the middle.

By working the last stitch of the RS through the back loop the side becomes flat and turns on the edge stitch. Almost the same I get when slipping the last stitch on the WS rows and knitting it as first stitch of the RS row.

When working these edges the edge stitches get worked only half as often as the middle stitches. If the middle is plain stochinette stitch this will lead to the edges being a little shorter than the middle. If you make a narrow piece with just one hemmed side it will curve with the hem being in the inside of the curve. So I recommend doing the hem only on wider pieces or on both sides. You can also work one or more middle ridges near that edge to balance the tension.


Middle ridges:

The sample piece has a middle ridge as well.

This is worked by knitting 1 stitch, slipping the next purlwise with yarn in front. The ridge will be as wide as the number of slipped stitches. Since these stitches will not make the piece wider, you need that many extra stitches. This is the change you need to make for adjusting a scarf or pattern.


Step 1 / 2 / 3:

The sample picture No. 1 shows the red (1), blue (2) and green (3) line. The areas beneath these lines are different stages of the swatch.

In the red (1): the swatch is only hemmed on the right side (seen from the RS of the fabric). The fabric curves to the right a bit (because of the different tension and the narrow strip)

In the blue (2) section I cast on additional stitches and made the middle ridge (some stochinette stitch being to its right still). This kept the piece mostly straight.

In the green section (3) there is a left hem, a middle ridge and a right hem keeping the piece straight and smooth.


Look and use:

The backside looks almost like ribbing in this piece because the hems and the middle ridge (that are not spaced evenly here) create different appearance of right side and wrong side stochinette. The difference to regular ribbing is that the front is all stochinette and the back is doubled up with an extra layer. The fabric actually is double thick there.

In the way these features are worked the fabric is not only double layered in parts but these hems and ridges are also tubes. They could be worked with open cast on or cast off and hold a string - like the strap for a hood on a sweater or the like.

I might make a video for the technique and link it here, but I think this description explains it pretty well.

For any questions please leave a comment or write me an email. I will do my best to help on!


Further technique:

if you want the bottom of the sections to be open, there are different ways to achive that.

For example here is a blog I got refered to:
Lost Arts Blogspot

Here is more web-info:
http://www.etsy.com/shop/klymyshyndesign?section_id=5120832

Saturday, September 18, 2010

neckwarmer Drops 116-10


I made this neckwarmer I had been looking at for a while.
It took me 2 train rides across the country of 6 hours each. My total work time may have been near 10 hours or so, maybe a little over.

The yarn is Merino Extra Fine by Drops (not Karisma as it called for)

http://garnstudio.com/lang/de/visoppskrift.php?d_nr=116&d_id=10&lang=de

here is my result:

inside with strands cought every second stitch


presented by my trusty hedgehog Meckie:


Addition: I have meanwhile made 2 videos about how to knit while weaving in the yarn on the inside and I want to link them here for further reference:


By the way: This is how I look with the whole winter set I made, just in case you wondered:


Sunday, September 12, 2010

Spongebob - Progress

The Sponge has taken shape. I am done with knitting both the sides and have done most of the stitching of lines on it. Once that is finished up I will sew it up and do the cuffs on neck and sleeveholes.

Friday, September 10, 2010

my background pictures

I still battle with the blog to get my background picture to look just like I want it. Once I have that done I will change it from time to time.
Mainly my background pictures are not knitting related (exceptions may happen, who knows) but photo related since I do have other hobbies as well :)

Thursday, September 9, 2010

Spongebob Pullover

someone, 8-years old, likes Spongebob Square Pants a lot. And I wanted to knit him a pullover. And there was the idea...

I talked about my plan to make a Spongebob pullover in the forum of knittinghelp.com, so I want to let you take part in my attempt.

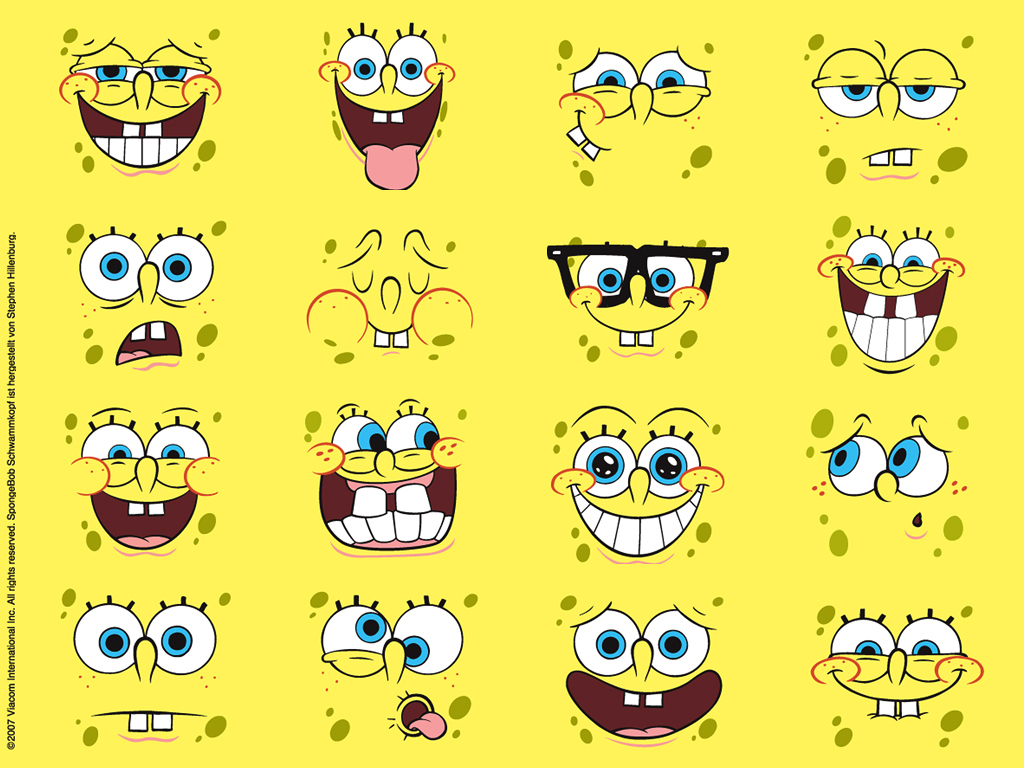
my basic models are these 2:


one side smiles, one side grumps  (I use the top right face for the backside and the bottom right face for the front side)


idea:
I want to make a sleeveless pullover that basically is the shape and appearance of Spongebob. It is for my godson who is 8 years-old now. He LOVES the idea.

project:
so, there was my task. I did not find a propper sample of a NICE boys pullover without sleeves that served the purpose. It is supposed to be straight but not endlessly bulky and so on. So I just made my own pattern. We will see how it works.

My idea is to make a pullover that has 2 front sides (both sides being the same) and 2 different facial expressions on it, so it can be worn either side around. (everything the same, except the face itself).

yarn:
Saturday I bought the yarn. I did not get to chose the yarn I was intending because it wasn't there in the color range I needed, so I went for 2 yarns by Lana Grossa that had the same meters (160m) per 50 g and look similar.

I needed yellow, off-yellow-to greenish, white, brown, black and red (for the tie and some pieces)

I swatched and came out with 20 stitches and 27 rows on 10 by 10 cm on a needle size 4.5mm.

size:
I decided to make the pullover 42 cm wide (approx a size 134 in German sizes and thereby a little big just now to grow into) and 46 cm high. It will be a little longer at first but he can grow within it. If I make all that efford, I want it to fit longer than just a few month. Kids that age grow taller faster than wider and he always is a skinny one anyways. So there will be some time in that piece.

shape:
I will do arm holes with some cast off alonge the edge and will make a relatively wide neck opening. I came up with approx. figures for that shaping already by consulting other patterns and books but I will wing it, mostly as I get to it.

knitted features:

the pullover is knitted in stochinette stitch (mostly) and has intarsia as well as stranding patterns in it.

bottom edge:
now, since it is a pullover to grow into, I did not want a cuff on the bottom that sits more or less tight on the hips. I wanted a straight edge.

I used needles size 3.5mm and cast on my 85 stitches (42,5 cm with 20st to the 10cm) with a provisional cast on (crochet on with contrast yarn).

after 15 rows of st st I undid the cast on, then purled the 2 sides of my seam line together stitch by stitch.

therefore I now have a tubular seam on the bottom that makes the pullover hang nice and straight but non-curling and with some weight to keep it straight.

design:

spongebob wears square pants, as we all know.
so the bottom edge is brown, then gets 4 rectangles near the end of the pants section in black (the belt behind the loops). I used stranding technique, twisting the yarns after each stitch so there are no floats.

stranding:
For that I used both yarns on my left hand (continetal knitter as I am) over the index finger, but my contrast color (black) runs over that finger reversed therefore hangs in the front. I then knit "over and under" alternatingly... I used to be really good at this, years ago, but I am rusty and need to practice again. the knits are fine, but the purls with the MC get me hard... I will keep trying)

small sections in black:
..like the corners of the shirt on spongebob: I used 2 yarn ends, 90 cm each, one for each corner of the shirt's collar. I started the first 2 stitches in the middle of that string and used either end for the edges running up to the collar line. like this I needed no stranding of black behind white ( I want to have as little string traveling the back as possible and also think, black behind white might show..)
this I will have to use again for the mouth and maybe around the eyes.
But I do reserve some lines of the desgin to embroidery after the fact. Not everything gets knit.

special feature:
Spongebob wears a tie. I made the tie (seed stitch) in a small piece, then, from the top of the pants, worked it into the knitting itself. So the tie is "part of" the shirt, but over the pants now, flapping. I will need to crochet and embroider some black around it to make the look better. By now the shape is not yet quite right, but then it will be sweet. The "knot part" of the tie is in garter stitch to change structure.


my knitting charts:


Each box in the grid was 5 stitches and 5 rows for me. If you make a pullover approximately the same size, you can stick with that. You can always make the yellow a little wider or smaller. If you make a pretty different size, you can estimate the boxes to be 4 stitches and 4 rows for a smaller pullover or 6 stitches and 6 rows for a bigger pullover and so forth.

The pictures are already stretched out so that the stitch-ratio of knitting stitches being higher than wide is taken into account.

Estimate the positions of all motives. I just eyeballed things as I went and it did work out. Just about getting teeth and eyes centered in the picture and getting the tie centered I recommend exact placement of the middle stitches.


material:


I bought too much yarn, by the way.
For the front side I used one ball of yellow in addition to all the other colors. So I will have to return some yellow to the shop. No big problem, though. They take it back or exchange it for something else as long as it is unused.

I am currently working on the back side of the pullover. The pictures I have up to now are just bad photo quality but they give a first impression of the front side. There still is a lot of the embroidery missing that is giving Spongebob his features. I will keep you posted on my progress.


front side of side No. 1
back side of side No. 1


Addition: I have meanwhile made 2 videos about how to knit while weaving in the yarn on the inside and I want to link them here for further reference:


EDIT: 
I finally posted the photos of the finished result: 

The Frog Prince

Lately I made The Frog Prince. Then I made the pattern and that is why I want to share it here. It also is available through my raverly page.

The pattern link you find here:

English: The Frogprince

German / Deutsch: Der Froschprinz
It can be worked from almost any yarn. It just will need to make a relatively tight fabric with the needles you use. This is the perfect stash user project and quick gift.

I got the idea when working this pattern by Susan B. Anderson, published on Ravelry under the name of the  mini-reversible duck-to-bunny

my sample, just from cheap stash yarn looked like this:


I then wanted to make sure I made a bigger size toy that fitted the hands of kids nicely but also serves a purpose of decoration for me in my home. The quest for a good motive brought me to The Frog Prince.

I hope there will be many frogs and princes popping up everywhere. Let me know if you make one. If I get to see a picture I would love it, of course.

I want to develope a few more charakters and figures but since the request for frog princes is big right now I just do not get to it next to all my other knitting projects and the rest of life.

Have fun with the little guy!

Wednesday, September 8, 2010

Hyperactive Knitting

I start blogging. I never thought I would. But here I am, writing about knitting and some things around it.

I hope you join me for some posts and I will try to make this site interesting to read.